Introduction
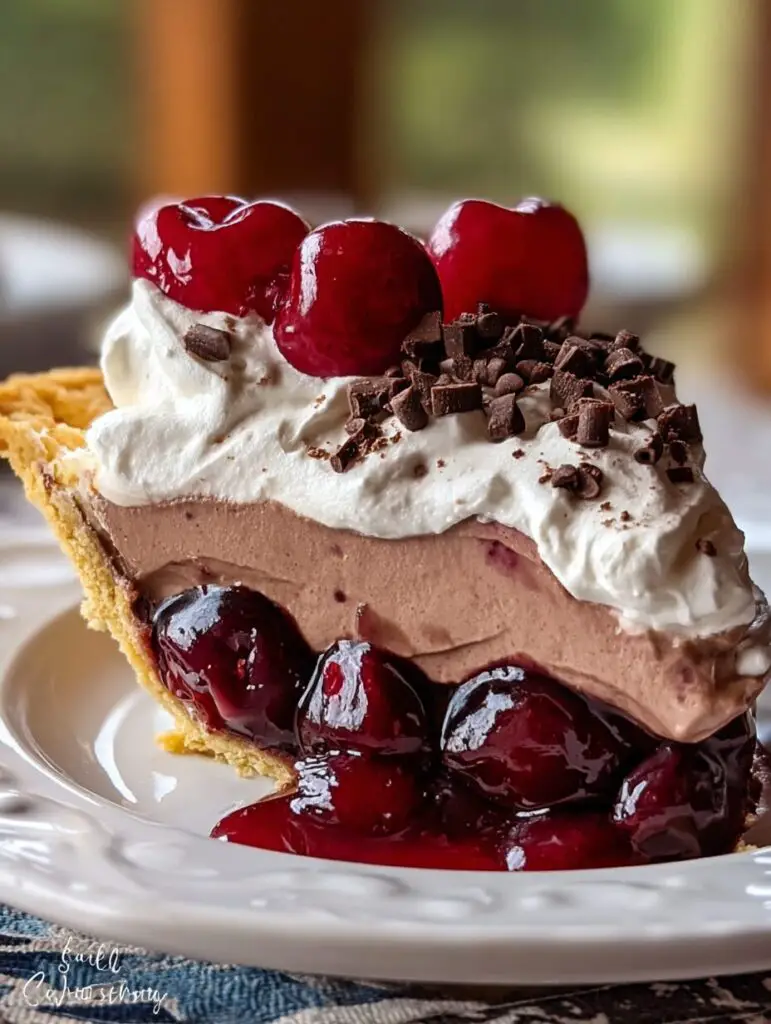
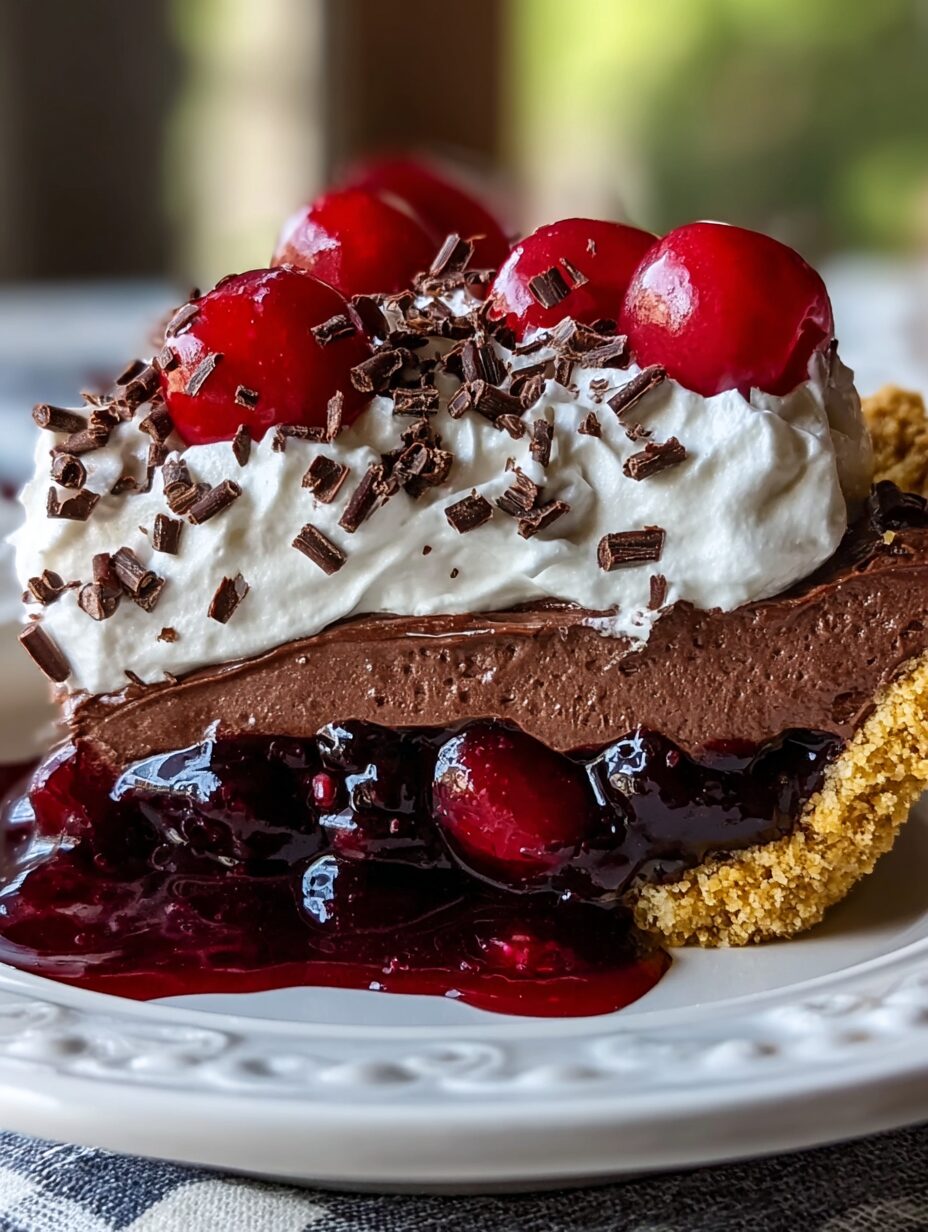
Chocolate Cherry Cream Pie is the dessert that brings back the sweetest memories of summer picnics with my family. I can still picture my aunt pulling this no-bake delight from the fridge, the glossy chocolate layer glistening under the sun, and the rich aroma of cherries wafting through the air. Each slice is a heavenly combination of creamy chocolate and tart cherries, creating a flavor explosion that dances on your taste buds. This chocolate cherry dessert is not just a treat; it’s a celebration of flavors that I’ve cherished for years. The best part? It’s incredibly easy to whip up, making it perfect for any occasion. Let’s get cooking!
Why You’ll Love It
- It’s a no-bake recipe, so it’s super quick to prepare.
- The combination of chocolate and cherry is simply irresistible.
- Perfect for summer gatherings or holiday celebrations.
- Can be made a day in advance for convenience.
- Rich and creamy texture that melts in your mouth.
- Budget-friendly ingredients that you probably already have.
- Customizable with different types of chocolate or toppings.
Ingredients for Chocolate Cherry Cream Pie
- 1 pre-baked 9-inch pie crust
- 1 can (21 oz) cherry pie filling (or homemade)
- 1 box (3.9 oz) chocolate pudding mix
- 2 cups cold milk (for pudding mix)
- 1 ½ cups whipped cream (homemade or store-bought)
- ½ cup chocolate chips (semi-sweet or dark)
- Fresh cherries for garnish (optional)
How to Make Chocolate Cherry Cream Pie
- Step 1: Ensure the pie crust is pre-baked and fully cooled before assembling.
- Step 2: Spread the cherry pie filling evenly across the bottom of the crust, letting those vibrant red cherries shine through.
- Step 3: Prepare the chocolate pudding according to the package instructions using cold milk. Let it thicken slightly, then spread it over the cherry layer, creating a luscious chocolate blanket.
- Step 4: Gently spread whipped cream over the chocolate layer, creating a smooth, fluffy topping that adds a lightness to the pie.
- Step 5: Sprinkle chocolate chips over the whipped cream, and add fresh cherries for extra flavor and presentation.
- Step 6: Chill the pie in the refrigerator for at least 2 hours to allow the layers to set and meld together.
- Step 7: Slice and serve chilled for a rich and creamy chocolate-cherry treat that everyone will love!
Pro Tips for the Best Chocolate Cherry Cream Pie
- For a homemade cherry pie filling, use fresh or frozen cherries cooked with sugar and cornstarch for a personal touch.
- Feel free to use different types of chocolate chips for varied flavor—dark chocolate adds a nice depth!
- This pie can be made a day in advance for convenience, allowing the flavors to develop beautifully.
What’s the secret to perfect Chocolate Cherry Cream Pie?
The secret lies in letting the pie chill long enough for the layers to set. This ensures each slice holds its shape and delivers that delightful combination of flavors.
Can I make Chocolate Cherry Cream Pie ahead of time?
Absolutely! In fact, making it a day ahead enhances the flavors and makes it easier to serve when guests arrive.
How do I avoid common mistakes with Chocolate Cherry Cream Pie?
Make sure your pie crust is completely cooled before adding the filling. This prevents a soggy bottom and keeps your pie perfectly layered.
Best Ways to Serve Chocolate Cherry Cream Pie
Serve this pie chilled, garnished with extra whipped cream and fresh cherries for a stunning presentation. It pairs beautifully with a scoop of vanilla ice cream or a cup of coffee for a delightful dessert experience.
Nutrition Facts for Chocolate Cherry Cream Pie
Per slice (based on 8 servings):
- Calories: 350
- Fat: 18g
- Protein: 4g
- Carbohydrates: 45g
- Sugar: 25g
- Fiber: 2g
This is an estimate and may vary.
How to Store and Reheat Chocolate Cherry Cream Pie
Store any leftovers in an airtight container in the refrigerator for up to 3 days. If you want to freeze it, wrap it tightly in plastic wrap and foil, and it will keep for up to 2 months. Thaw in the fridge overnight before serving.
Frequently Asked Questions About Chocolate Cherry Cream Pie
Can I use fresh cherries instead of pie filling?
Yes! Just make sure to cook them down with sugar and cornstarch to create a thick filling.
What can I substitute for whipped cream?
You can use whipped topping or even a dairy-free alternative if you prefer.
How do I make this pie gluten-free?
Simply use a gluten-free pie crust, and you’re all set for a delicious gluten-free dessert!
Variations of Chocolate Cherry Cream Pie You Can Try
- Vegan: Use a plant-based pie crust, dairy-free chocolate pudding, and coconut whipped cream.
- Gluten-Free: Swap the pie crust for a gluten-free version, and ensure all ingredients are certified gluten-free.
- Mint Chocolate Cherry: Add a few drops of peppermint extract to the chocolate pudding for a refreshing twist.
- Nutty Chocolate Cherry: Stir in some chopped nuts like pecans or almonds for added crunch and flavor.
Chocolate Cherry Cream Pie is the dessert that always brings a smile to my face, especially when I think back to my best friend’s birthday party last summer. We set up a picnic in the park, and as I unveiled this no-bake delight, the sun caught the glossy chocolate layer, making it look almost too good to eat! The sweet aroma of cherries mixed with the rich chocolate was simply irresistible. Each slice was a creamy, dreamy experience, with the tart cherries perfectly balancing the luscious chocolate pudding. This chocolate cherry dessert has become a staple in my kitchen, not just for its incredible flavor but also for how easy it is to whip up. It’s the kind of treat that makes any gathering feel special, and trust me, everyone will be asking for seconds! So, grab your ingredients, and let’s get cooking!
Why You’ll Love It
- It’s a no-bake recipe, making it a breeze to prepare on hot days.
- The delightful combination of rich chocolate and tart cherries is simply mouthwatering.
- Perfect for any occasion, from casual family dinners to festive celebrations.
- Can be made ahead of time, allowing the flavors to meld beautifully.
- Rich and creamy texture that feels indulgent without being overly heavy.
- Budget-friendly ingredients that are easy to find at your local grocery store.
- Customizable with different toppings or chocolate varieties to suit your taste.
- It’s a crowd-pleaser—everyone will be asking for your chocolate cherry dessert recipe!
Ingredients for Chocolate Cherry Cream Pie
- 1 pre-baked 9-inch pie crust – This serves as the sturdy base for our pie, providing a delightful crunch that contrasts with the creamy filling.
- 1 can (21 oz) cherry pie filling (or homemade) – The star of the show! This adds a burst of tart sweetness that perfectly complements the rich chocolate.
- 1 box (3.9 oz) chocolate pudding mix – This is what gives our pie its luscious, creamy texture and deep chocolate flavor.
- 2 cups cold milk (for pudding mix) – Essential for preparing the pudding, it helps create that smooth, velvety consistency.
- 1 ½ cups whipped cream (homemade or store-bought) – This lightens up the pie, adding a fluffy layer that balances the richness of the chocolate.
- ½ cup chocolate chips (semi-sweet or dark) – These little gems add extra chocolatey goodness and a delightful crunch on top.
- Fresh cherries for garnish (optional) – Not only do they look beautiful, but they also enhance the cherry flavor and add a fresh touch.
How to Make Chocolate Cherry Cream Pie
- Step 1: Start by ensuring your pie crust is pre-baked and completely cooled. This is crucial to avoid a soggy bottom and to keep those beautiful layers intact.
- Step 2: Spread the cherry pie filling evenly across the bottom of the crust. Let those vibrant red cherries shine through, creating a stunning base that’s both sweet and tart.
- Step 3: In a mixing bowl, prepare the chocolate pudding according to the package instructions using cold milk. Whisk it until it thickens slightly, then spread it over the cherry layer, creating a luscious chocolate blanket that will make your mouth water.
- Step 4: Gently spread the whipped cream over the chocolate layer. This fluffy topping adds a lightness that perfectly balances the richness of the chocolate and the tartness of the cherries.
- Step 5: Sprinkle chocolate chips over the whipped cream for that extra chocolatey goodness, and if you like, add fresh cherries on top for a pop of color and flavor.
- Step 6: Chill the pie in the refrigerator for at least 2 hours. This allows the layers to set and meld together, creating a slice that holds its shape beautifully.
- Step 7: Once chilled, slice and serve your Chocolate Cherry Cream Pie cold. Each bite will be a rich and creamy chocolate-cherry treat that everyone will adore!

Pro Tips for the Best Chocolate Cherry Cream Pie
- For an extra layer of flavor, consider adding a splash of almond extract to the cherry filling. It enhances the cherry taste and adds a delightful twist!
- Use cold milk when preparing the chocolate pudding to ensure it thickens properly and achieves that velvety texture.
- Don’t skip the chilling time! Allowing the pie to set in the refrigerator for at least 2 hours is key to achieving clean slices and a well-defined layer structure.
- If you want to elevate the presentation, pipe the whipped cream on top using a star tip for a beautiful finish.
What’s the secret to perfect Chocolate Cherry Cream Pie?
The secret lies in the layering technique! Make sure each layer is spread evenly and allow the pie to chill long enough for the flavors to meld together. This ensures a harmonious blend of chocolate and cherry in every bite.
Can I make Chocolate Cherry Cream Pie ahead of time?
Absolutely! This pie is perfect for making a day in advance. Just cover it tightly with plastic wrap and store it in the refrigerator. The flavors will deepen, and it will be ready to impress your guests!
How do I avoid common mistakes with Chocolate Cherry Cream Pie?
One common pitfall is not letting the pie crust cool completely before adding the filling. This can lead to a soggy bottom. Also, be sure to whisk the pudding thoroughly to avoid lumps, and always chill the pie long enough to set properly.
Best Ways to Serve Chocolate Cherry Cream Pie
When it comes to serving your Chocolate Cherry Cream Pie, presentation is key! I love to slice it into generous pieces and serve each slice on a chilled plate, topped with a dollop of extra whipped cream and a sprinkle of chocolate chips for that added flair. For a delightful twist, pair it with a scoop of vanilla ice cream—its creamy texture complements the rich chocolate and tart cherries beautifully. You can also serve it alongside a cup of freshly brewed coffee or a glass of cold milk, making it the perfect ending to any meal. Trust me, your guests will be raving about this chocolate cherry dessert long after the last bite!
Nutrition Facts for Chocolate Cherry Cream Pie
Per slice (based on 8 servings):
- Calories: 350
- Fat: 18g
- Saturated Fat: 10g
- Trans Fat: 0g
- Cholesterol: 30mg
- Protein: 4g
- Carbohydrates: 45g
- Sugar: 25g
- Fiber: 2g
- Sodium: 200mg
This is an estimate and may vary based on specific ingredients used.
How to Store and Reheat Chocolate Cherry Cream Pie
To keep your Chocolate Cherry Cream Pie fresh, store any leftovers in an airtight container in the refrigerator for up to 3 days. If you want to enjoy it later, you can freeze the pie by wrapping it tightly in plastic wrap and then in aluminum foil. It will keep well in the freezer for up to 2 months. When you’re ready to indulge again, simply thaw it in the fridge overnight. There’s no need to reheat this no-bake delight; it’s best served chilled, allowing the flavors to shine through. Just slice and enjoy your creamy chocolate-cherry treat!
Frequently Asked Questions About Chocolate Cherry Cream Pie
Can I use fresh cherries instead of pie filling?
Yes, you can absolutely use fresh cherries! Just make sure to cook them down with sugar and cornstarch to create a thick filling that mimics the consistency of canned cherry pie filling. This will enhance the flavor and give you that delightful tartness.
What can I substitute for whipped cream?
If you’re looking for alternatives to whipped cream, you can use whipped topping or even a dairy-free option like coconut whipped cream. Both will add that light, fluffy texture without compromising the overall taste of your chocolate cherry dessert.
How do I make this pie gluten-free?
Making your Chocolate Cherry Cream Pie gluten-free is simple! Just swap out the regular pie crust for a gluten-free version. Ensure that all other ingredients, like the pudding mix and chocolate chips, are also gluten-free to keep the entire dessert safe for those with gluten sensitivities.
Can I add other flavors to the pie?
Absolutely! You can get creative with flavors. For instance, adding a splash of almond extract to the cherry filling can elevate the taste. You could also try incorporating mint extract into the chocolate pudding for a refreshing twist. The possibilities are endless!

Variations of Chocolate Cherry Cream Pie You Can Try
- Vegan: Swap the pie crust for a plant-based version, use dairy-free chocolate pudding, and top it with coconut whipped cream for a deliciously creamy treat that everyone can enjoy.
- Gluten-Free: Use a gluten-free pie crust and ensure all other ingredients, like the pudding mix and chocolate chips, are certified gluten-free for a safe and tasty dessert.
- Mint Chocolate Cherry: Add a few drops of peppermint extract to the chocolate pudding for a refreshing twist that pairs beautifully with the tart cherries.
- Chocolate Hazelnut Cherry: Incorporate hazelnut spread into the chocolate pudding for a nutty flavor that complements the cherries perfectly, creating a decadent dessert experience.

Chocolate Cherry Cream Pie: A Heavenly No-Bake Delight!
- Total Time: 2 hours 20 minutes
- Yield: 8 servings
- Diet: Vegetarian
Description
A delicious no-bake dessert combining chocolate and cherry flavors in a creamy pie.
Ingredients
- 1 pre-baked 9-inch pie crust
- 1 can (21 oz) cherry pie filling (or homemade)
- 1 box (3.9 oz) chocolate pudding mix
- 2 cups cold milk (for pudding mix)
- 1 ½ cups whipped cream (homemade or store-bought)
- ½ cup chocolate chips (semi-sweet or dark)
- Fresh cherries for garnish (optional)
Instructions
- Ensure the pie crust is pre-baked and fully cooled before assembling.
- Spread the cherry pie filling evenly across the bottom of the crust.
- Prepare the chocolate pudding according to the package instructions using cold milk. Let it thicken slightly, then spread it over the cherry layer.
- Gently spread whipped cream over the chocolate layer, creating a smooth, even topping.
- Sprinkle chocolate chips over the whipped cream, and add fresh cherries for extra flavor and presentation.
- Chill the pie in the refrigerator for at least 2 hours to allow the layers to set.
- Slice and serve chilled for a rich and creamy chocolate-cherry treat!
Notes
- For a homemade cherry pie filling, use fresh or frozen cherries cooked with sugar and cornstarch.
- Feel free to use different types of chocolate chips for varied flavor.
- This pie can be made a day in advance for convenience.
- Prep Time: 20 minutes
- Cook Time: 0 minutes
- Category: Dessert
- Method: No-Bake
- Cuisine: American
Nutrition
- Serving Size: 1 slice
- Calories: 350
- Sugar: 25g
- Sodium: 200mg
- Fat: 18g
- Saturated Fat: 10g
- Unsaturated Fat: 6g
- Trans Fat: 0g
- Carbohydrates: 45g
- Fiber: 2g
- Protein: 4g
- Cholesterol: 30mg


