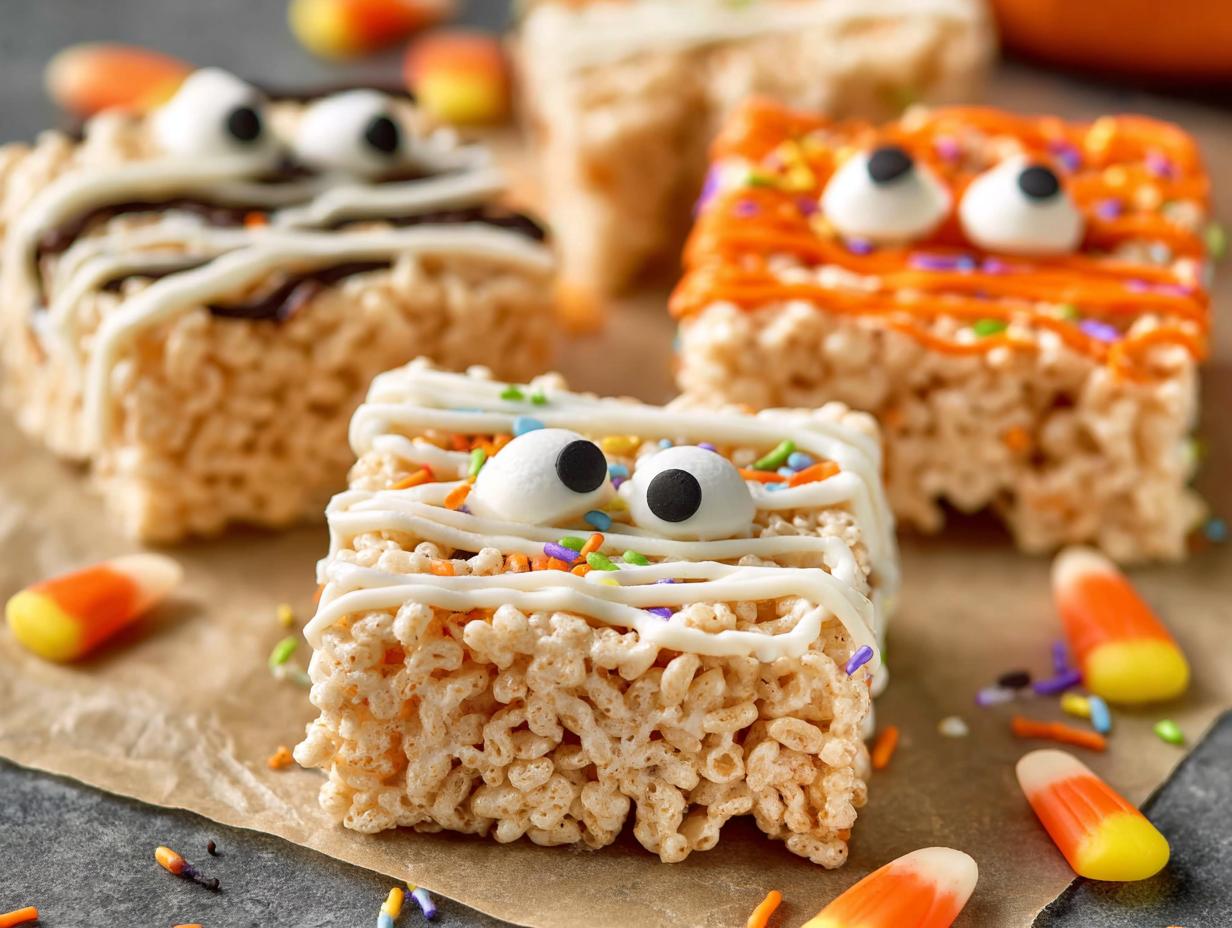
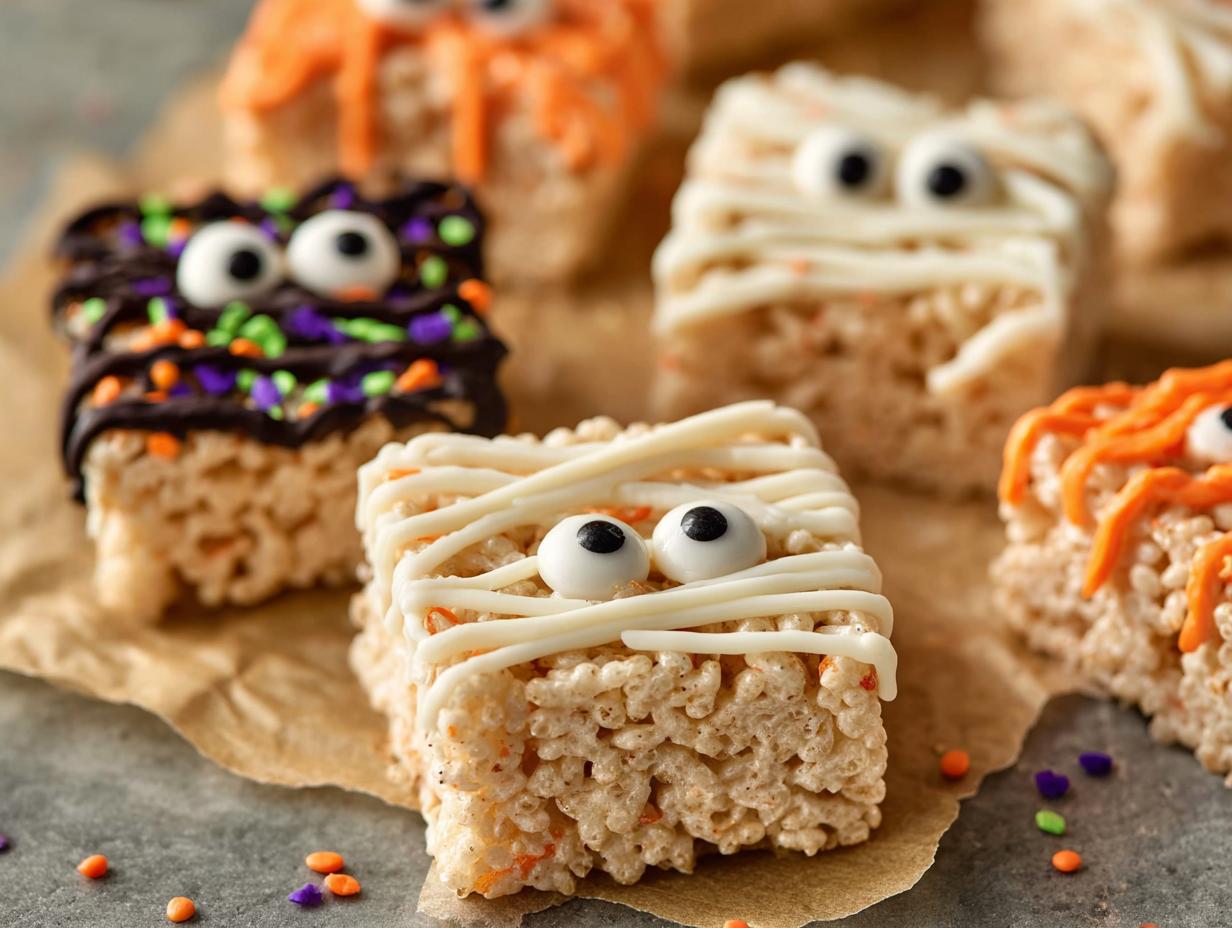
Easy Halloween Rice Krispie Treats have become my absolute go-to for a quick, festive dessert that always brings smiles. I remember making these with my mom as a kid, the sweet, gooey marshmallow mixture coating every crispy bite, and the sheer excitement of turning them into spooky shapes. The smell of melted marshmallows fills my kitchen with such a comforting, nostalgic aroma, and they’re so simple to whip up, even on a busy weeknight. These Halloween Rice Krispie Treats are a guaranteed hit for any party or just a fun afternoon activity. Let’s get cooking!
You’ll absolutely adore making these Halloween Rice Krispie Treats! They’re a fantastic addition to any spooky celebration.
- So incredibly easy to make, perfect for busy hosts.
- A guaranteed hit with children, making them ideal Halloween Rice Krispie Treats for kids.
- They are truly Simple Halloween Rice Krispie Treats that require minimal effort.
- The no-bake method means less fuss and no oven required.
- Endless decorating possibilities for creative fun.
- They offer a delightful sweet and chewy texture everyone loves.
- Quick cleanup makes them a stress-free party option.
Ingredients for Spooky Rice Krispie Treats Ideas
Gathering your ingredients is the first step to creating these fun Halloween themed Rice Krispie Treats! You’ll need the essentials for the base and then some decorative goodies to bring your spooky designs to life. The candy melts are perfect for creating smooth, vibrant decorations, whether you’re making mummy bandages or ghost faces. Don’t forget those Halloween sprinkles for an extra pop of festive color!
- 5 cups Rice Krispies cereal – the crispy foundation
- 1/4 cup butter – helps melt the marshmallows
- 4 cups mini marshmallows – for that gooey, sweet binding
- 1 cup white candy melts – ideal for decorating mummy bandages, ghost faces, or as a base for other spooky designs
- 1/2 cup semi-sweet chocolate chips – for crafting spiderweb details or cute ghost eyes and mouths
- 1/4 cup Halloween sprinkles – adds festive color and crunch
- 2 tablespoons candy eyes – essential for bringing those mummy treats to life!
- 5 drops liquid food coloring (purple, orange, or black) – optional, for an extra spooky hue to your marshmallow mixture

How to Make Halloween Rice Krispie Treats
Let’s dive into making these wonderfully spooky and delicious treats! This process is so straightforward, you’ll be amazed at at how quickly you can whip up a batch of these festive delights. This recipe is perfect for anyone looking for easy Halloween no-bake treats Rice Krispie options.
- Step 1: Start by grabbing a large mixing bowl and pouring in 5 cups of Rice Krispies cereal. Next, lightly grease an 8×8-inch pan with butter or non-stick spray. This prep work ensures your treats won’t stick!
- Step 2: In a medium saucepan, melt 1/4 cup of butter over low heat. Once it’s melted, add 4 cups of mini marshmallows. Stir constantly until the marshmallows are completely melted and the mixture is smooth and gooey. If you’re aiming for a more vibrant, spooky look, now’s the time to stir in a few drops of your food coloring until you achieve your desired eerie hue.
- Step 3: Carefully pour the warm, gooey marshmallow mixture over the Rice Krispies cereal in the large bowl. Using a spatula, stir gently until all the cereal is evenly coated. If you’re adding sprinkles directly into the mix for an extra festive crunch, fold them in now.
- Step 4: Transfer the coated cereal mixture into your prepared 8×8-inch pan. Use a piece of wax or parchment paper to press the mixture down evenly. Be gentle – you want to keep these treats light and airy, not dense!
- Step 5: Allow the treats to cool completely in the pan for about 20-30 minutes. For a quicker cool-down, you can pop the pan into the refrigerator for about 5 minutes. This step is crucial for easy cutting and decorating.
- Step 6: Once cooled, cut the large block into squares or cookie-cutter shapes for your Halloween Rice Krispie Treat shapes. Now comes the fun part – decorating! Drizzle with melted white candy melts and add candy eyes for mummy treats, or spread melted white candy and use chocolate chips for ghost faces. For spiderweb designs, melt chocolate, drizzle in a spiral, and drag lines outward with a toothpick. These steps show you exactly how to make Halloween Rice Krispie Treats that will wow your guests.

Fun Halloween Rice Krispie Treats Decorations
Now for the best part – turning your basic treats into festive masterpieces! These Decorated Halloween Rice Krispie Treats are so versatile, allowing you to create all sorts of fun Halloween Rice Krispie Treat shapes. Whether you’re going for creepy or cute, there are so many ways to make them spooktacular!
How to make Ghost Rice Krispie Treats Halloween
To create adorable Cute Halloween Rice Krispie Treats like ghosts, simply cut your cooled treats into squares. Melt some white candy melts, spread them over the tops, and use a toothpick dipped in melted chocolate to draw on eyes and a spooky smile. So simple and so sweet!
How to make Spiderweb Rice Krispie Treats Halloween
For a classic Halloween Rice Krispie Treats recipe twist, take your cut treats and melt some semi-sweet chocolate chips. Drizzle the melted chocolate in a spiral pattern on top of each treat. Then, using a toothpick, gently drag lines from the center outwards to create a perfect spiderweb effect. You can find more creative dessert ideas here.
How to make Mummy Rice Krispie Treats Halloween
To craft the Best Halloween Rice Krispie Treats resembling mummies, cut your treats into rectangles. Melt white candy melts and drizzle them back and forth across the surface to create mummy bandages. Before the candy melts set, place two candy eyes near the top for a fun, spooky gaze.
Best Ways to Serve Halloween Party Rice Krispie Treats
Once your spooky creations are ready, presenting them is half the fun! These festive treats are perfect for a Halloween party buffet or as individual party favors. For a truly memorable spread, consider arranging your Rice Krispie Treats for Halloween party alongside other classic Halloween desserts like pumpkin cupcakes or spooky fruit platters. You could also package them in individual cellophane bags tied with ribbon for easy grab-and-go treats that guests can take home. For more party planning tips, check out this resource.
Nutrition Facts for Halloween Dessert Rice Krispie Treats
Curious about the nutritional breakdown of these fun treats? Here’s a look at what you can expect in each delightful bite of these Halloween Rice Krispie Treats. They’re a fun, festive option for your party spread!
- Calories: 180
- Fat: 7g
- Saturated Fat: 4g
- Unsaturated Fat: 3g
- Trans Fat: 0g
- Protein: 1g
- Carbohydrates: 28g
- Fiber: 0g
- Sugar: 20g
- Sodium: 80mg
- Cholesterol: 10mg
Nutritional values are estimates and may vary based on specific ingredients and decorations used. For more information on general nutrition, you can refer to the National Library of Medicine’s nutrition resources.
How to Store and Reheat Halloween Rice Krispie Treats
Keeping your festive Halloween Rice Krispie Treats fresh is super simple! After you’ve finished decorating your spooky shapes, make sure they’ve cooled completely. This is key to preventing them from getting soggy. For optimal freshness, store them in an airtight container. You can layer them with parchment paper to prevent sticking, especially if you’ve made a variety of Halloween themed Rice Krispie Treats.
These treats will stay delicious at room temperature for about 3-4 days. If you need to store them for longer, they freeze beautifully! Wrap individual treats tightly in plastic wrap, then in aluminum foil, and pop them in the freezer for up to 3 months. To reheat, simply let them thaw at room temperature for a bit before enjoying. They’re so versatile, making them perfect for make-ahead Halloween party prep! You can find more tips on food storage here.
Frequently Asked Questions About Halloween Rice Krispie Treats
Can I make Halloween Rice Krispie Treats ahead of time?
Absolutely! These Easy Halloween Rice Krispie Treats are fantastic for making ahead. Once they’ve cooled and you’ve finished decorating, store them in an airtight container at room temperature for up to 3-4 days. Layering them with parchment paper helps keep your decorated designs intact, making them perfect for stress-free party planning.
What’s the best way to get crisp shapes for my Halloween Rice Krispie Treats?
For the cleanest cuts and best Halloween Rice Krispie Treat shapes, let the mixture cool completely in the pan before cutting. You can speed this up by chilling the pan in the refrigerator for about 5 minutes. Use a sharp knife or cookie cutters that have been lightly greased or lightly sprayed with non-stick cooking spray. This helps prevent sticking and ensures crisp edges for all your spooky designs.
My Halloween Rice Krispie Treats are too hard. How can I make them softer?
If your Easy Halloween Rice Krispie Treats turned out too hard, it usually means the marshmallow mixture was cooked too long or the cereal was pressed too firmly into the pan. Next time, try melting the marshmallows and butter gently over low heat until just smooth, and avoid pressing down too hard when transferring the mixture to the pan. A lighter touch results in a chewier texture! For more baking tips, consider this guide on baking fundamentals.
Can I use different cereals for these Halloween themed Rice Krispie Treats?
While Rice Krispies are classic, you can certainly experiment! Other puffed rice cereals or even corn flakes can work, but they might alter the texture and flavor slightly. For the most authentic and beloved texture that makes these Halloween Rice Krispie Treats so popular, sticking with traditional Rice Krispies is usually best.
Variations of Halloween Themed Rice Krispie Treats
While the classic recipe is fantastic, you can easily customize these treats to be even more unique! Playing with colors and add-ins opens up a world of creative possibilities for your Halloween themed Rice Krispie Treats. Don’t be afraid to get experimental and make them your own!
- Spooky Color Swirls: Divide the melted marshmallow mixture before adding the cereal. Tint each portion with Halloween colors like orange, purple, or green using food coloring. Gently swirl the colored mixtures together in the pan before pressing to create marbled effects.
- Candy Corn Crunch: For a festive fall flavor and texture, fold in about 1/2 cup of candy corn along with the cereal mixture. It adds a chewy sweetness that pairs wonderfully with the crispiness.
- Seasonal Shapes: Instead of just cutting squares, use Halloween-themed cookie cutters (like bats, pumpkins, or skulls) once the mixture has cooled slightly. This is a simple way to create distinct Halloween Rice Krispie Treat shapes.
- Festive Fillings: For an extra surprise, press half the mixture into the pan, add a layer of your favorite Halloween candy (like M&Ms or Reese’s Pieces), and then top with the remaining cereal mixture before pressing.

Amazing Halloween Rice Krispie Treats for 3-4 Days
- Total Time: 35 minutes
- Yield: 16 servings
- Diet: Vegetarian
Description
Create fun and spooky Halloween Rice Krispie Treats with this easy no-bake recipe. Perfect for parties and a delight for kids, these treats can be decorated as mummies, ghosts, or spiderwebs.
Ingredients
- 5 cups Rice Krispies cereal
- 1/4 cup butter
- 4 cups mini marshmallows
- 1 cup white candy melts (for mummies and ghosts)
- 1/2 cup semi-sweet chocolate chips (for spider webs or ghosts)
- 1/4 cup Halloween sprinkles
- 2 tablespoons candy eyes (for mummies)
- 5 drops liquid food coloring (purple, orange, or black)
Instructions
- Pour 5 cups Rice Krispies cereal into a large mixing bowl. Lightly grease an 8×8-inch pan.
- Melt 1/4 cup butter in a saucepan over low heat. Add 4 cups mini marshmallows and stir until fully melted and smooth. Optional: Add food coloring for a spooky hue.
- Pour the melted marshmallow mixture over the cereal. Stir until evenly coated. Fold in sprinkles if using.
- Transfer the mixture to the prepared pan. Press evenly using wax or parchment paper.
- Allow treats to cool completely for 20-30 minutes, or chill for 5 minutes for faster cooling.
- Decorate as desired. For mummy treats, drizzle white candy melts and add candy eyes. For ghost faces, spread melted white candy melts, add chocolate chips for eyes and mouth. For spiderwebs, melt chocolate, drizzle in a spiral, and drag lines outward with a toothpick.
Notes
- For faster cooling, place the pan in the refrigerator for about 5 minutes.
- Be careful not to press the mixture too hard in the pan to keep the treats light and chewy.
- Prep Time: 15 minutes
- Cook Time: 5 minutes
- Category: Dessert
- Method: No-Bake
- Cuisine: American
Nutrition
- Serving Size: 1 treat
- Calories: 180
- Sugar: 20g
- Sodium: 80mg
- Fat: 7g
- Saturated Fat: 4g
- Unsaturated Fat: 3g
- Trans Fat: 0g
- Carbohydrates: 28g
- Fiber: 0g
- Protein: 1g
- Cholesterol: 10mg


